Email identities are the foundation of your sender reputation. They represent the sender's name and email address, lending credibility to your emails. ConnectPlex enables you to configure and manage these identities, ensuring that your communications are recognized and trusted by recipients.
We highly recommend using our domain for sending emails. Using ConnectPlex's domain for emails reduces bounce rates and ensures better delivery by managing reputations. The system automatically organizes incoming emails and only forwards relevant leads to the clients. Additionally, creating an email identity on the ConnectPlex domain is easy and straightforward. In contrast, setting up identities on other domains involves navigating through slightly detailed steps to ensure everything is set up correctly.
We recommend retaining default settings, but if necessary, you may increase the daily limit to a maximum of 250. Avoid exceeding this threshold.


To check if your email identity is set up correctly, please follow the steps mentioned here Three Steps Verification
We recommend retaining default settings, but if necessary, you may increase the daily limit to a maximum of 250. Avoid exceeding this threshold.
Click on SMTP
SMTP server username: enter the same email address used in step 2.
Set a SMTP server password : SMTP password is generated after doing the 2 step verification in Outlook or G- Suite (it should be 16 digit password).
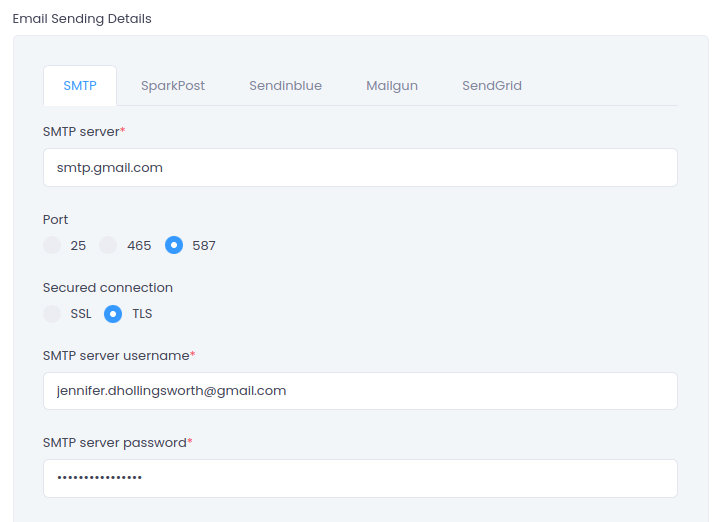
Coordinate with your company IT administrator or email address provider for any required login/password/setup details.
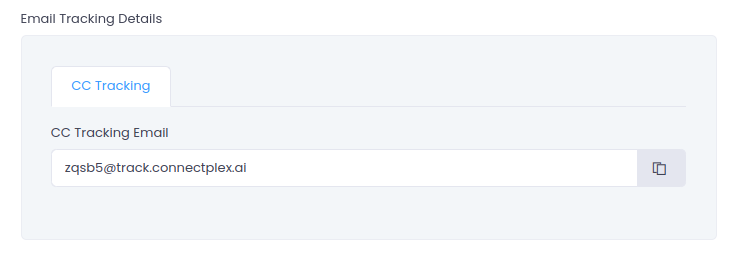
To set up the CC tracking email:
To check if your email identity is set up correctly, please follow the steps mentioned here Three Steps Verification
After setting up your email identity, please proceed with the following three-steps verification process to ensure its proper configuration.
Click on the edit detail of newly created email identity and search for “Testing”
Sending Verification:
To confirm that the newly created email identity can send emails correctly, follow these steps:
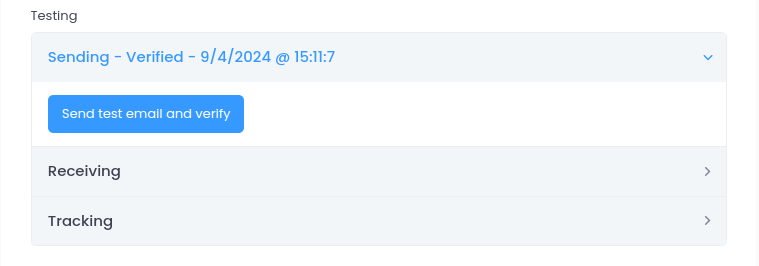
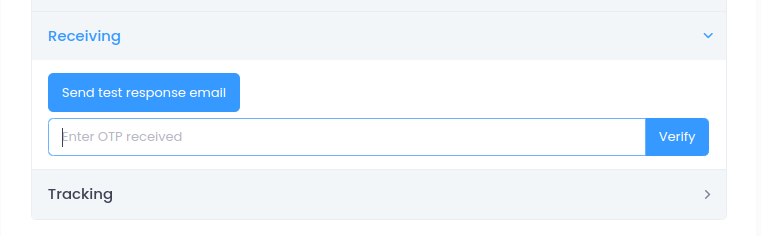
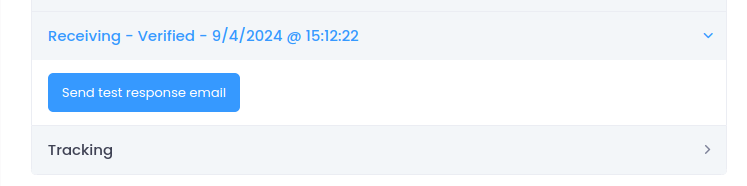
Receiving Verification:
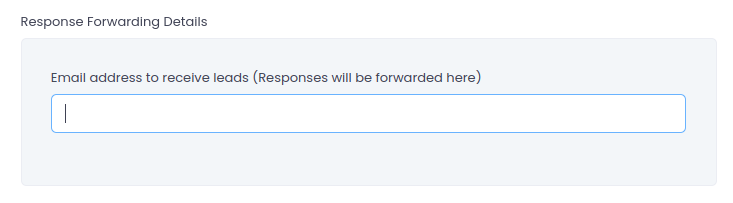
To ensure that the email address mentioned under response forwarding details can receive email responses, follow these steps:
Tracking Verification:
To confirm that the ConnectPlex tracking ID reflected under CC Tracking is functioning correctly, follow these steps:
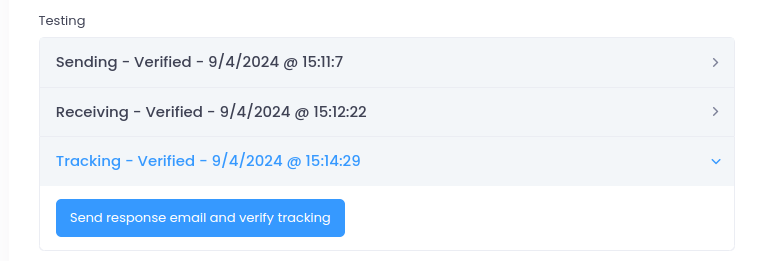
Once all three tests are successfully completed without any errors, your email identity is ready to use.
Advanced View


The Advanced View in the Email Identity Dashboard provides in-depth insights into the performance of each email identity used in Connectplex.
How to Access Advanced View?
Understanding Email Identity Ratings
The performance of an email identity is rated using a star system (1 to 3 stars):
( 1 Star - Red): The email identity has been disabled due to a poor sending ratio. If this happens:
( 2 Stars - Yellow): The email identity is still in the warming-up phase. Continue using it carefully until it stabilizes and turns green.
( 3 Stars - Green): The email identity is performing well and can be used without restrictions.
Advanced Health Metrics
The Advanced Health section provides key performance indicators for each email identity, including:
Impact of a Disabled Email Identity
If an email identity is disabled:
Best Practices to Maintain Email Identity Health
By following these best practices, you can ensure smooth email sequences and maintain a healthy email reputation within Connectplex.
Show All Inboxes
The Show All Inboxes feature in ConnectPlex allows users to view all emails received across multiple email identities within their account in a single, consolidated inbox.
Why Use "Show All Inboxes"?
Features of "Show All Inboxes"
This feature enhances email management efficiency by ensuring that no important emails are missed, especially when handling multiple identities.